CyBar 845050MC – Part 1 Design and Construction
The idea for a Café CyBar came to me while in Berlin. An old, worn doorway to an abandoned building got me thinking about a café submerged in espionage during the Second World War which was worn by foot traffic and cigarette smoke.
Hand written the description of the CyBar which is below is in black and then notes on putting theory into practice are highlighted text.
Overview
After recently obtaining an old worn pallet I intended to use to make a frame for a Mondo Kill List poster, I decided to use the material for a CyBar instead after a trip to Berlin.
I would use the pallet in conjunction with some mahogany left over from CyBar 286080DD in order to add detail and highlights.
Wood on one side – interior – would be finely polished, then a stain used to make as smooth as possible. The outside of the chest area of the CyBar would be rough, the texture of the pallet in its current state.
The legs of the CyBar would be a mixture of all. Partial amount of rough pallet showing with mostly polished area being visible and accompanied by polished mahogany.
The front would be two mahogany doors hanging from a frame of the unpolished pallet wood.
- The doors are long and thin, unlike previous CyBar 286080DD. Also unlike 286080DD, there will be no veneer pattern on the doors so instead try to chisel in panels.
- Pare out the design of panels on a regular door – standard two rectangular spaces as per household doors. Use the scalpel to cut out basic shape, then pare out the rest of the detail with a chisel.
- Flirted with the idea of making the rectangular design a domino as per the Dominoid City.
- Dominoid City is a future Ealu project.
- Flirted with the idea of making the rectangular design a domino as per the Dominoid City.
- Pare out the design of panels on a regular door – standard two rectangular spaces as per household doors. Use the scalpel to cut out basic shape, then pare out the rest of the detail with a chisel.
- Hang doors so they open out.
- Use bee’s wax to finish mahogany. Polish the doors. Might be a nice way to finish.
Interior
Interior of the CyBar will be to reflect an early 20th century European café during the Second World War.
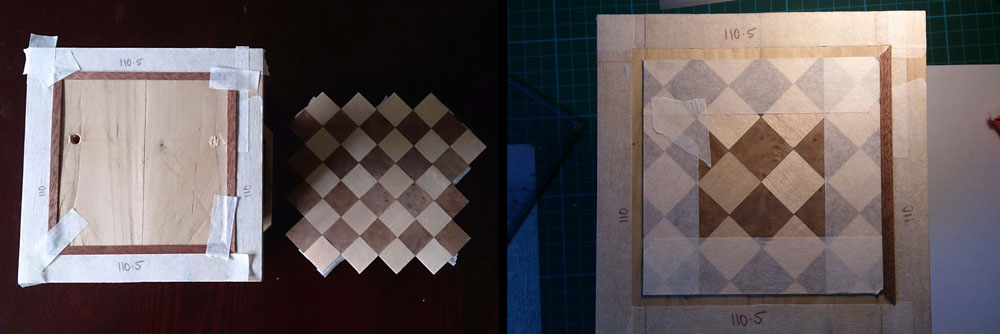
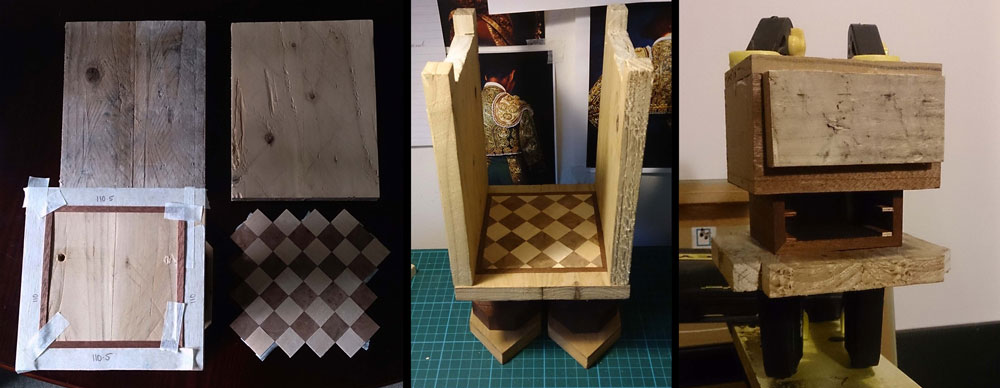
There would be parquet flooring which will be pine and walnut. There will be a border of mahogany on the floor.
- No design is required for the floor. Just simple squares rotated to diamonds of two different types of wood.
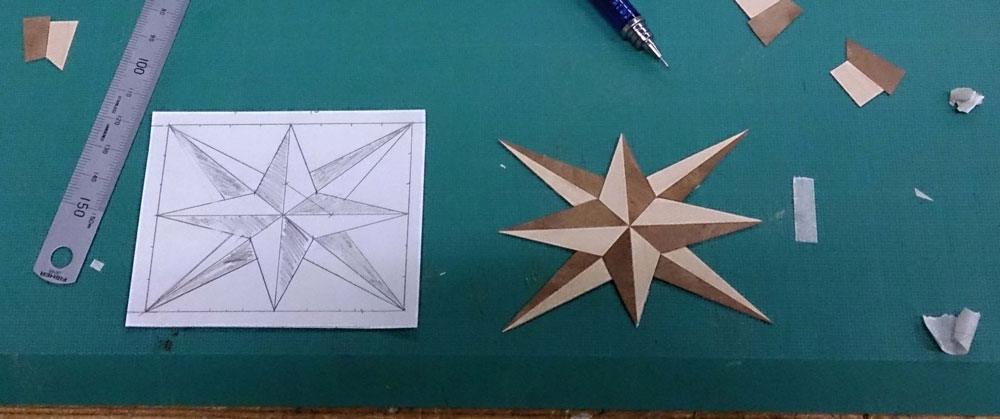
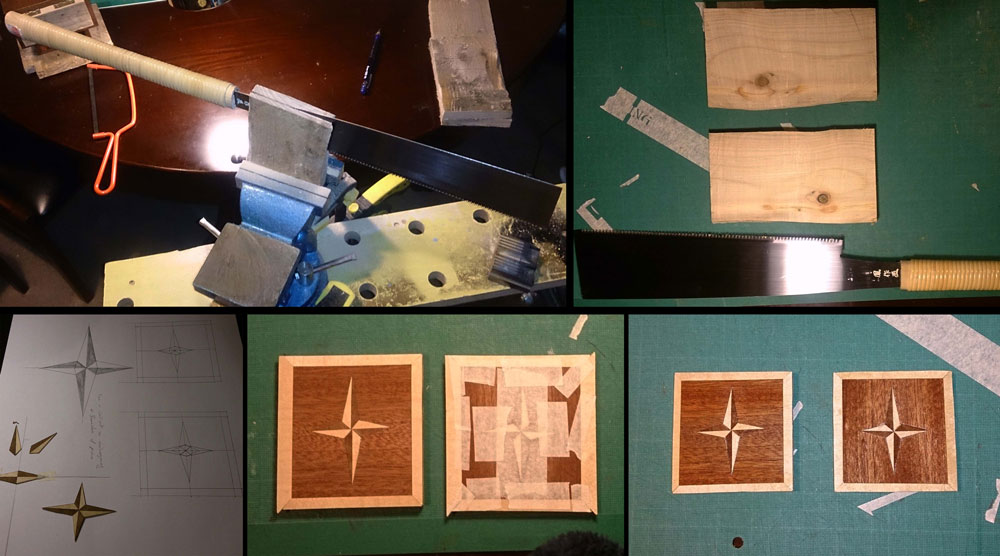
- I thought of adding an 8 point star to the floor, as a centre piece. However, I thought that it would be too time consuming to cut out the shape from the floor to insert the star without a lot of the square breaking up.
- I only came to this realisation after I had created the star.
I ended up cutting my losses but knew I could use the piece for something else and ended up just going with the parquet pattern with a mahogany border.
Inside there would be a small bar. The bar begins approx. half way down the space – resulting in two sections to the interior. The bar would be two small panels of 6mm MDF covered in mahogany veneer. There would be coving across the top which would be flat, creating a bar.
- As the panels only come approx. half way of the height of the interior chest, the flat of the coving coupled with the thickness of the MDF means going to get approx. 10mm ledge which would be veneered and become bar top.
- The bar top would be met on the side walls by the same type of rail. So a border runs around the first section of the bar. The border separates the side walls vertically to wallpaper below and bare stained wood above.
- The wallpaper would be slowly starting to peel off – use tea to stain and soak to peel off parts, just rub with fingers if required.
- I decided to ditch the wall paper idea. For the wallpaper I wanted, I would have to print it out as an image, as opposed to the real thing as the patterns would be too big and would not fit. When not using the wallpaper, I decided to ditch the coving idea also and replace with a stripe of veneer. This panned out badly in the end as the veneer just ended up looking like a fucking “go-faster” stripe on the side walls and looks stupid taking away from the whole interior.
- The wallpaper would be slowly starting to peel off – use tea to stain and soak to peel off parts, just rub with fingers if required.
- Small border / skirting board runs across the floor against the walls.
- This will cover the any gap between flooring and wall but needs to be stained as mahogany.
- This did not happen either. What I wanted to use was about double the height in ratio to a standard skirting board so I ditched the idea.
- This will cover the any gap between flooring and wall but needs to be stained as mahogany.
- Possibly put a picture on the wall with a broken frame. Not especially necessary – if necessary at all
From the two pieces of veneered MDF / “bar”, a stand rises. A small rectangle box of four flat pieces of very thin panel – plywood was used – secured together which is then supported by four pieces of 6mm dowel which would be stained mahogany or possible stain like walls.
- This became only two pieces of dowel as the other two were not required as I created a small ledge on each piece for the sign to rest.
- As the plywood was veneered with mahogany, I felt staining the dowels the same colour would be too much so they became gold.
Behind MDF and underneath rectangle is where mini-bottles can be kept. The initial space in the interior would be for two glasses.
- I would have really liked to get 2 mini-brandy glasses for the interior but could not locate any the correct size to fit. I have therefore had to use standard shot glasses which fit better if placed behind the “bar” and the mini-bottles in the first space.
- I would love to find a cocktail that was brandy and Cointreau but doubt one exists.
The ceiling would be lined with a mirror and the back also, but I would prefer 6 small mirrors tiled.
- Would like a small stencil on these but just a frame with nothing in it, just sprayed on. Even just elements of the stencil frame as it looks like was rubbed off / scratched off in parts. Plain black. No additional colours required.
- Neither the tiled smaller mirror nor the stencil ever materialised. The tiled mirror was an issue due to the fact that the pieces were too small to be gotten from a glazier. I would like to say the stencil never materialised due to the fact it moved too far back to an old tag I had dismissed as too immature and therefore compromising the style of the interior of the robot…however, I’m also sure it was due to the fact that I was too lazy to create and execute the stencil, but I’d like to think it was the former.
I wanted to place a doll house light in the interior again to illuminate the bar part.
Four battery powered lights would hang from the ceiling, possibly dangling. Maybe two on the roof and one on either wall. Don’t want to illuminate fully to see all the shit parts though.
- I had found doll house light which did not require power from a 9-volt battery. A small, watch battery was enough to power them so I had a lot more freedom. Despite this, I still opted to go for a singular light in the centre of the roof as it was sufficient as the mirror ceiling reflected the light just the right about to fully illuminate but not show up all the shit parts – i.e. the mistakes and fuck ups overly consistent in my learning curve.
Head
The head would be same / very similar to the previous robot in the sense of small part then larger attached to the top.
- Unlike CyBar 286080DD, I did not need the entire part of the top of the head to hold a light. I had learned that no matter how strong the torch / light, it would be drowned out as a beacon by city light pollution. There was no point in wasting the space so I should use it for something else.
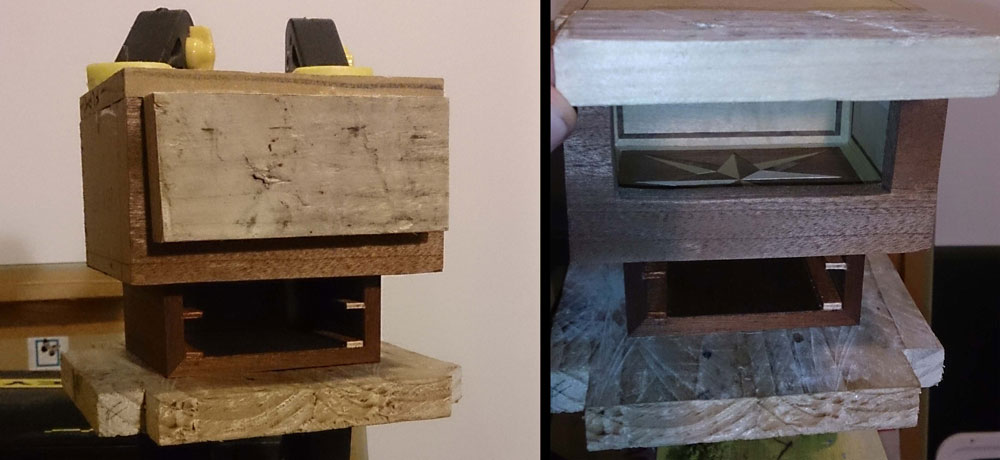
- I created the top of the head from 6mm MDF veneered with mahogany. This gave me a large interior to work with as what would become a small hidden space in which I could display the previously created 8 point star.
- A piece of crate could then be placed over an opening with the hinges placed hidden from view which would lift up to reveal the space.
- Whoever finds the robot can use this space as they wish…but I’d be hiding contraband in it.
“Jaw”
The jaw would be similar to the previous CyBar, however…written text for jaw ends here
- I planned for the jaw to be very similar to 28-60-80-DD. A three sided rectangle made from MDF which would be attached to the top of the robot chest securely with dowels to provide support for the top of the head.
- The MDF would be veneered in mahogany.
- I wanted the space to be useful, but I did not have to hide a battery in the space as per CyBar 28-60-80-DD so I had a lot of room to place something in. After some thought I decided to go with a two coasters for the glasses which would slot into the space resting on little shelves.
- I made the coasters by cutting and splitting a single piece of crate, then cut down to two 70mm squared pieces then veneers with 4 point stars reflecting the theme of the 8 point star in the robot’s head.
Arms
The arms will be five piece arms like CyBar 286080DD.
Upper Arm
- Start with circle shoulders from the pallet wood with the rough side facing out as the shoulders for the robot.
- I attached two circles of wood cut from the pallet using a drill piece for cutting holes for home ceiling light fixtures. I could use the piece that was cut out as the circle. However, the tool also made a hole within the circle. While this allowed me to use dowel to then securely to the exterior wall, this hole always bugged me as making the robot look silly overall.
- Months after the robot was constructed, I finally got two pieces of left over mahogany from CyBar 286080DD and placed them over the holes. Despite the black hole of problems I see in 845050MC, all the mistakes and fuck ups, it really felt like it came together only after I placed the two pieces of mahogany on its shoulders long after it was complete.
- Pallet wood polished as per inside of robot
- Minimal amount of wood – 40mm long x 35mm
Lower Arm
- Again, pallet wood polished as per inside of robot and stained
- Same measurements in width as upper. The length must surpass the front of the CyBar from elbow joint, otherwise, will not be able to attach claws.
- Elbows – Elbows will be wedges of mahogany again, as per CyBar 28-60-80-DD. Will be difficult to make them as straight / flush as on 28-60-80-DD due to lack of access to a guillotine.
- In order to make the elbows as flush as possible so the upper and lower arms were flush also, I bought a tool which was basically a handheld table saw. I thought I was the dog’s bollocks…so smart…and this tool would resolve any problems I had with making angles flush. Unfortunately I was very wrong as when I went to cut the elbows, the blade burnt the mahogany on contact. However, I was forced to use the pieces as they were flush and hand no further mahogany of the correct size to use.
Claws
Claws will be made from strips of mahogany left over from robot 28-60-80-DD.
- The claws would be very similar to the claw mechanism on Ripley’s power loader from Aliens.
- A strip of mahogany cut at a 45 degree angle at each end to complement each other will be stuck to the end of the lower arm.
- Off this strip, two more strips will extend at 90 degree angles in a fork shape.
- The strip against the lower arm will be wider than the lower arm width in order to facilitate the “fork”.
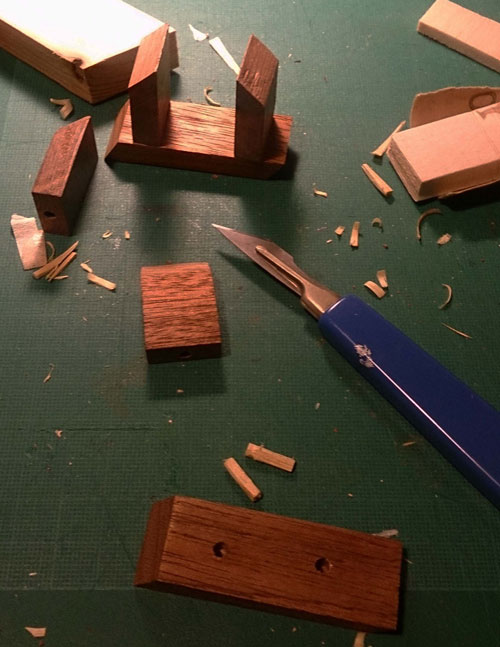
I was very happy with this design for the robot claws. Although it seems very simple, to me it was quite effective and I was happy with the result. In order to attach the fork elements securely I had to drill small holes in the pieces of mahogany and then use broken matchsticks as dowels to hold them together.
When I was putting together the claws together, I decided to make one more open than the other and while a very minor difference, I believe gives the robot more personality and it is not uniform all over.
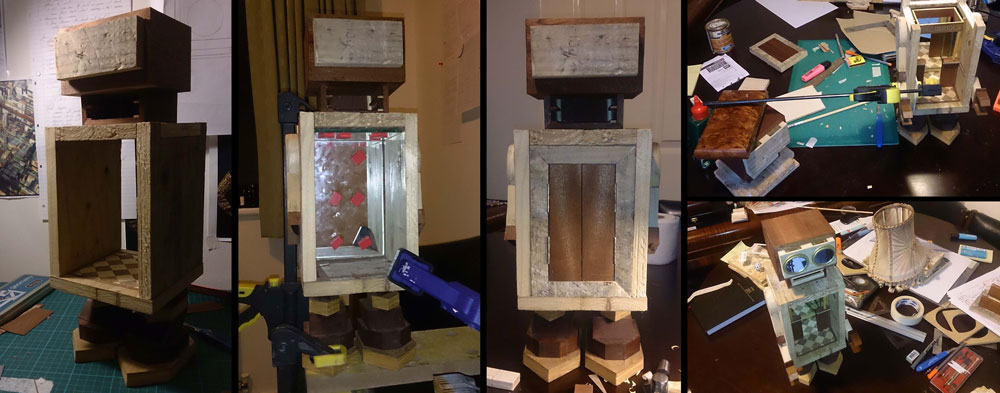
Having learnt what happens when you construct the chest cavity prematurely from CyBar 286080DD, I ensured all parts had been constructed with the relative decorative elements and I was able to begin sticking CyBar 845050MC together.
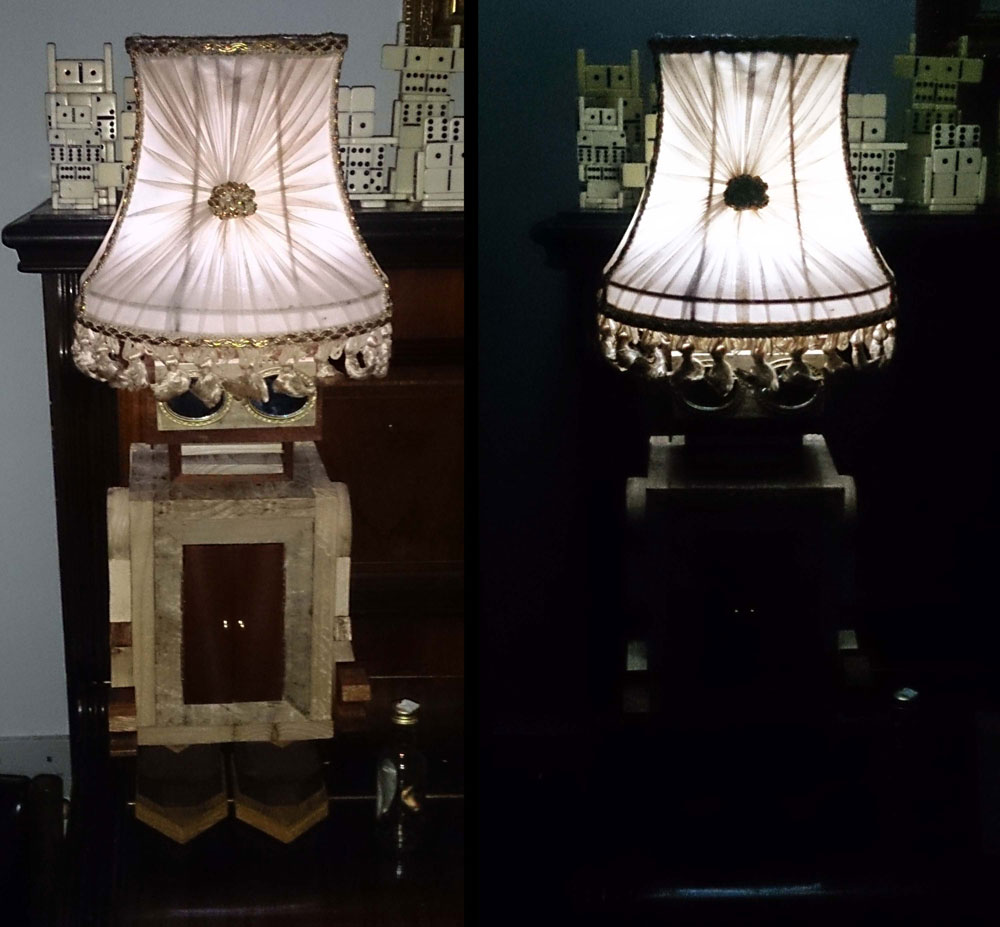
Lamp
The final element of robot construction was the lamp element.
- I had previously purchased a vintage looking lamp shade for CyBar 28-60-80-DD but could not use it as it made the head of CyBar 286080DD unstable. As the crate robot was stronger I decided to use it.
- I stained the shade using tea water. As I usually use this to dab on my wrists as a form of cheap cologne, I had a ready supply to use to give it an ugly worn look.
- I cut out a square piece of crate and drilled a hole in it using the same tool as I had used for the robots shoulders. This allowed me to place a circular led light in the hole which when turned on in conjunction with the shade provided a lamp effect.
CyBar 845050MC was then complete and ready to be “placed” somewhere in Dublin City at a later date.
