CyBar 977090DD – Design & Construction Part 1
I was always going to do a CyBar with a 70’s theme, I just had to think of something nice enough. I love the houses from the California hills from that decade, the furniture and art which decorated them and refined elegance of those who came to these houses for parties.
Hand written the description of the CyBar which is below is in black and then notes on putting theory into practice are highlighted text.
Exterior
The 70’s CyBar – CyBar 977090DD – would be constructed from OSB board which is usually used to surround active building sites. It would require an orange “glow” to it using a form of varnish – possibly yacht varnish
- Discuss with Mark [a friend who looks like a sexy lumberjack] about this – Can this be done with an airbrush?
- Can’t be done with an airbrush – know myself it would clog it, never get cleaned properly
- Would prefer to do this as wood is turning a light colour waiting to be used.
- Will have to varnish CyBar as the weather is changing and if CyBar gets wet at all it would have a strong effect on the OCB
Want a bathroom feel for the exterior of the CyBar. It’s chest should be 2 large mirror doors like a bathroom cabinet
- See section concerning chest cavity doors
Parts of the feet and arms will be studded with small square white tiles to emphasis the bathroom feel.
- Sections of the legs would be lined with the tiles and possible the elbows, claws or upper arms.
- This never came to fruition as I felt it wasn’t required to be that decorative exteriorly. The idea also reminded me of Nintendo CyBar I want to make at some point and felt stupid and as it would take away from the simplicity and elegance of the CyBar.
Want to make tops of legs wider on 97-70-90-DD to provide more support due to the weight of the CyBar.
Chest
The inside of the chest cavity, the mini-bar area, would be 1970’s themed. I want it to look like the living room of California hills house from the 70s. Houses that hung from the steep hill faces with extensive views of California through floor to ceiling windows.
- The most common reference to this style of house is the Sheats Goldstein Residence by architect John Lautner as seen in the film The Big Lebowski.
- I could not pack in all the detail of one of Lautner’s main room’s just to size and thus tried to adapt to a “den”…or if I was lucky, maybe some where in-between.
The represented room would have a dipped floor. Two to three steps would go down to an area where bottles would be placed.
- The steps would be made from 6mm MDF and stuck together.
- The area leading to the steps and the steps themselves would be lined with carpet.
- I would like a form of shag carpeting for this. However, this could prove difficult due to thickness of the carpet.
- Possibly trim the carpet.
- White colour would be nice.
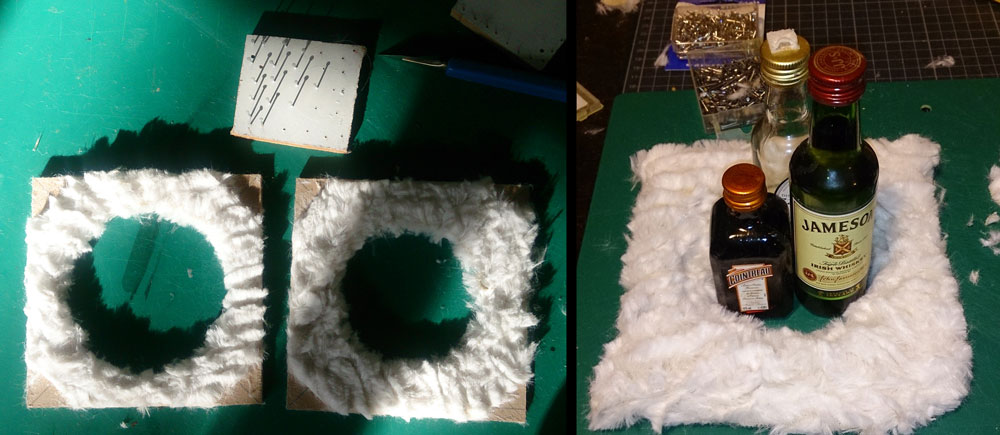
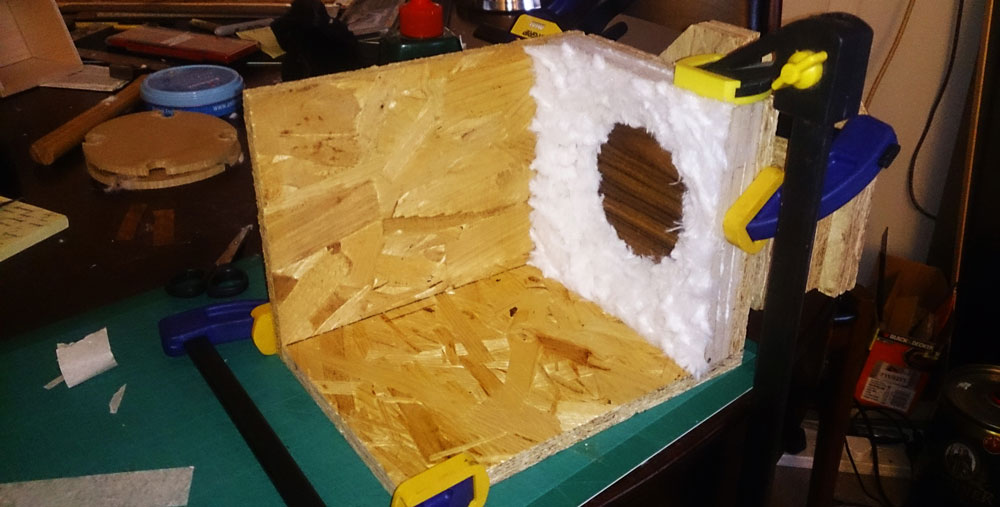
- In order to make the steps, I cut out three pieces of 6mm MDF to the same measurements as the base of the CyBar. I then cut circles in the MDF of growing sizes which could be stacked. I purchased a very cheap looking white faux fur and lined the pieces of MDF on the areas which was exposed when stacked. This allowed me to stick the 3 pieces of MDF together which may not have been possible if all of each piece of MDF had been covered with the faux fur.
The floor would dip down using the steps leading to a veneered floor.
- Not sure what kind of veneer pattern would be needed here. Possibly a “V” shape interlocking done very small. Possibly another 8 point compass star.
- In the end, I did neither. The prospect of making another veneer pattern along with the walls was too much and instead I just used a nice piece of veneer I had bought from eBay. Honestly, I just didn’t want the hassle.
I was able to put the layered faux steps onto the base of the CyBar creating the drop down area / pit for the mini bottles to stand in.
Types of Veneer to Use
- Ash
- Cheery
- Walnut – Possibly one of the new veneers purchased – black colour veneer.
- In this order – give mahogany a break
- In the end, I wound up using three veneers. Two were from a purchase on eBay which I have no idea what they were called. One was the black / very dark colour veneer as mentioned above and the other a nice (but very difficult to cut) veneer with dark brown hues. In addition to these two I used a pine veneer – light to compliment the black coloured veneer.
For the veneer patterns for the walls of the chest cavity, I was initially thinking a circular pattern. However, perhaps rectangular with rounded edges would be better.
- Initially what I wanted to do a silhouette of an iconic 70s lady, possibly more than one, in veneer. I thought of Pam Greer or Charlie’s Angels in action poses…but it was never going to happen. I would day-dream over how good it would look and never do anything about it because I was scared my ability would not live up to my expectations and it went on too long.
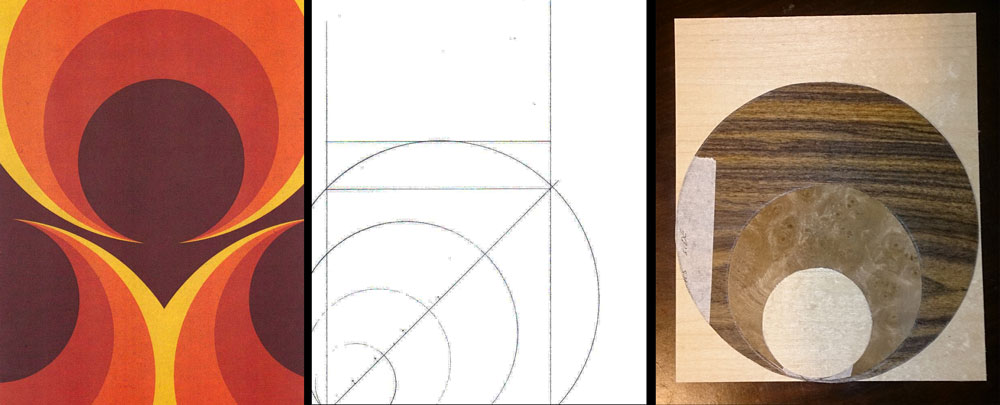
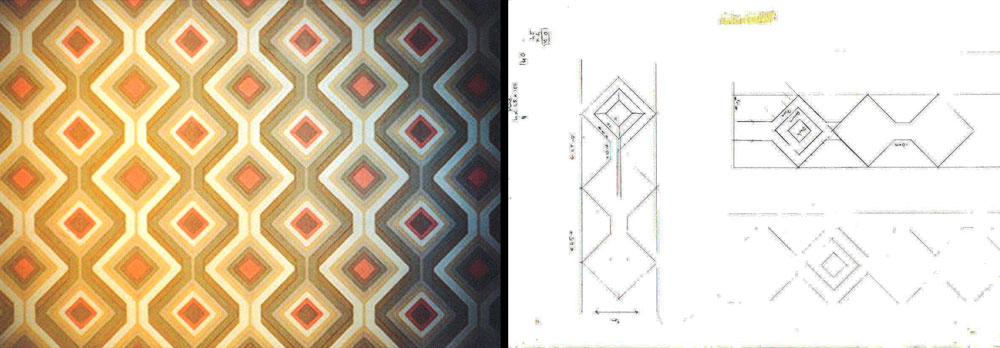
- I finally began experimenting with the circular pattern idea. It would be four separate circles which appear to stem from each other, each one becoming bigger. This is a very standard 70s pattern on wallpapers often done in oranges and browns/blacks, so in theory, ideal.
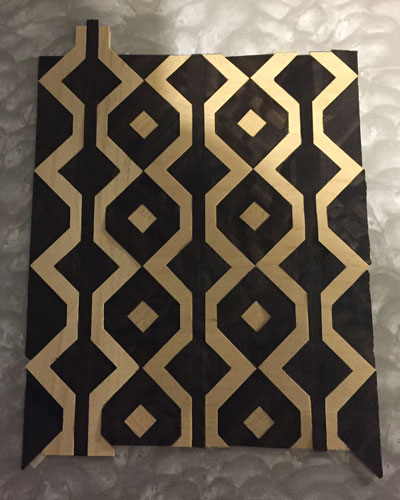
This pattern theory did not last long as I didn’t believe the veneer circles were good enough fitting into each other. Also, the three types of veneer didn’t complement one another at all. It was not going to look as good as I wanted it to, thus, I rejected the pattern. I then tried to create my own pattern, but this effort did not last long as I found it too frustrating and instead moved onto looking for something on the internet. After pissing about reviewing alternative patterns, day-dreaming and thinking I was productive, I located a pattern which had defined straight lines and whose pattern was based on a standard 45 degree angle. In fairness, the pattern had many layers of colour but I was able to reduce to two…the black/dark veneer I purchased on eBay and a pine veneer.
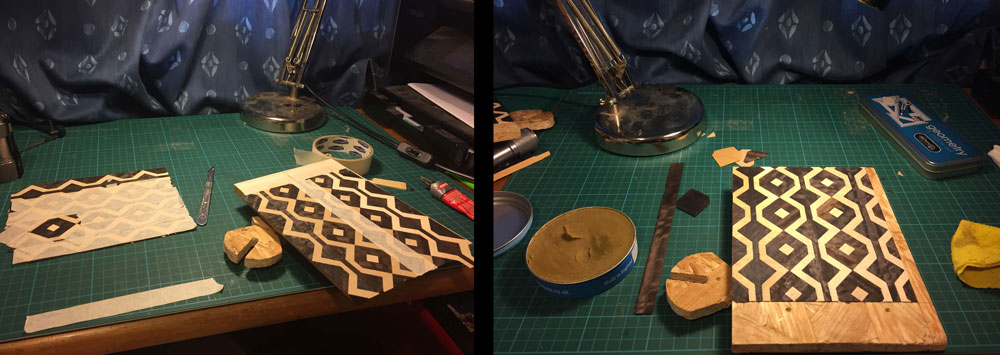
The pattern called for a standard size of diamond framed by lines of alternative veneer. I had to make each zig-zagged line of veneer to surround a line of diamonds from a continuous solid piece. However, the pieces kept snapping as the blade was either not sharp enough or I pulled to hard at the end of the cut. Also, I could never get the angle correct for numerous reasons. How can you possibly fuck up a 45 degree angle cut with a scalpel and a metal ruler?…but I did…constantly. The black veneer was so brittle and many times broke away very small chunks which resulted in so many pieces being broken and having to start again and again and again because they were not good enough.
Cutting out the veneer pattern for the walls took so fucking long. It was frustrating and dis-heartening. I now regret making this pattern choice deeply as the pattern had too many reflective elements within it. I hate this pattern despite it looking complete and acceptable to someone looking in from the outside. It looks horrible to me and is a dreadfully disappointing attempt at a standard piece of veneering. I should have chosen or designed a rectangular pattern or three to four simple pieces which would have looked just as effective.
- What’s more of a roshambo, is now that I begin to design my art-deco themed CyBar, the pattern reminds me more of art-deco style than 70s. In addition, my efforts on the circular pattern seamed together more fluidly than the pattern which is now permanent.
After sticking down the veneer with Impact Glue – the smell of which I use to relish but now despise – I used bee’s wax to bring out the wood’s natural colour.
Brass screws can be used to hold the CyBar together with wood glue support. I do like the idea of the brass screws as I believe it reflects the OSB board nicely.
- Also, there is no way to really put a joint into OSB wood without it crumbling to pieces, it’s just chips of wood, MDF has more structure. But brass screws are also just so easy and nothing like 60 dove tail joints – See CyBar 611013CDN.
In the back of the area, there will be two small raised areas (like pillars) on which to place two small disco lights.
- The pillars did not end up happening. The area meant to be used was too small and pillars to hold the lights would not fit. I chose to just stick the disco ball light to the mirrored ceiling as per other CyBars.
Notations on the CyBar 79-70-90-DD ended here from what I can find from notebooks.
Part 2 of the blog with continue with the design and construction of CyBar 977090DD’s head, arms, door and base.
